

Blogs
How to Use Compass and Protractor to Draw Accurate Angles: A Step-by-Step Guide

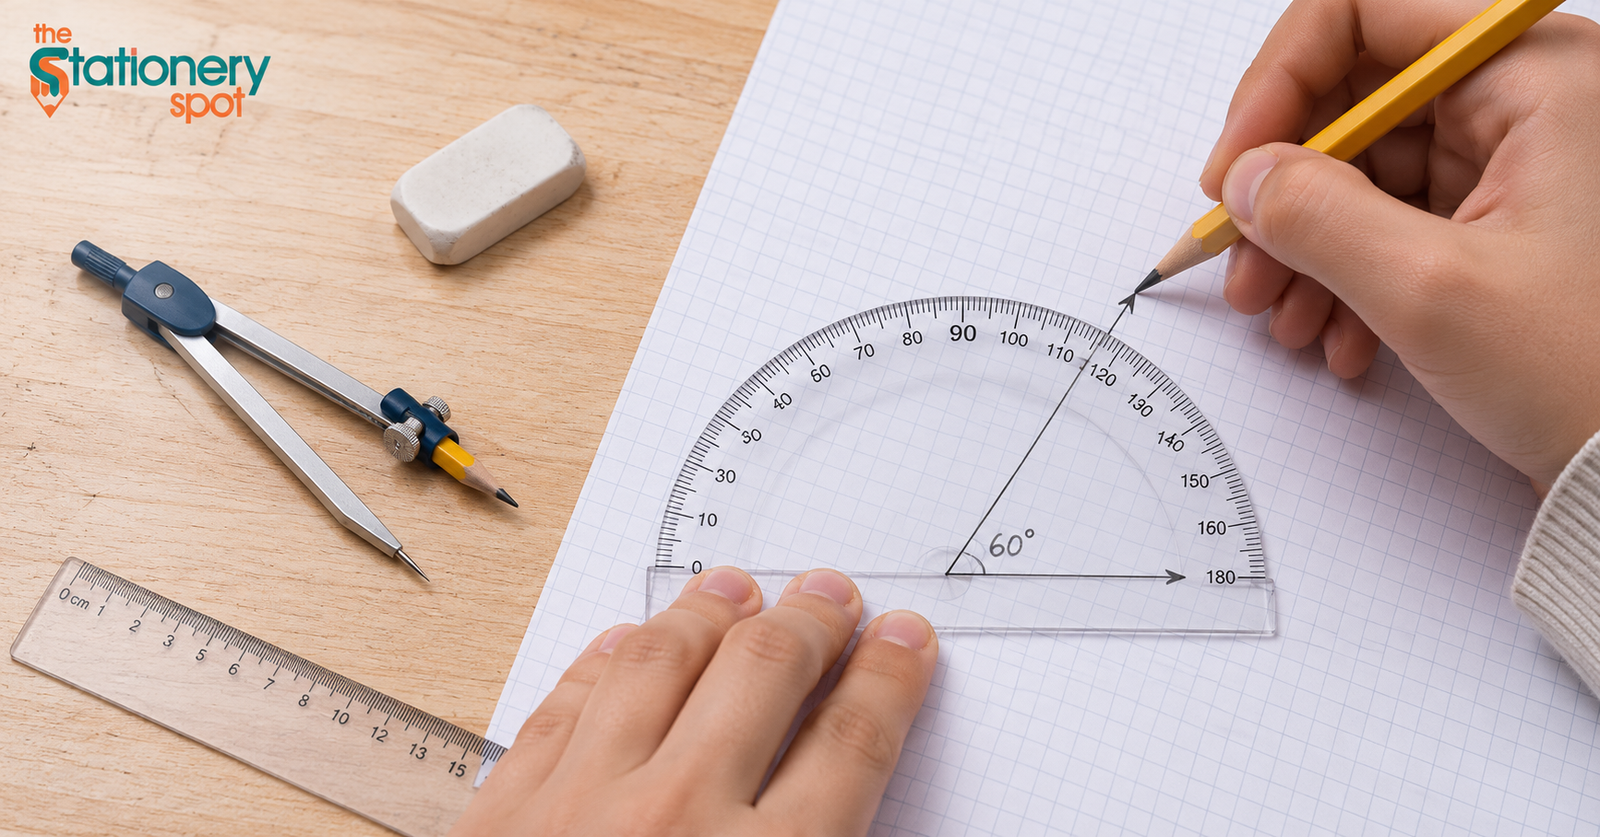
Learning how to use compass and protractor correctly makes geometry easier, whether you are preparing for school exams, completing maths homework or creating accurate technical drawings. A protractor measures angles in degrees, while a compass helps draw circles, arcs and equal distances. Together, these tools allow students to construct and check accurate geometric shapes.
For Pakistani students studying mathematics from primary classes to college level, knowing the correct technique can save time, prevent mistakes and improve the presentation of geometry answers.
What Are a Compass and Protractor Used For?
A compass and protractor are two essential mathematical drawing instruments, but each has a different purpose.
- Compass: Used to draw circles, semicircles, arcs and equal-length curves. It also helps construct perpendicular bisectors and angles.
- Protractor: Used to measure existing angles and draw new angles according to a specific degree measurement, such as 45°, 60° or 90°.
Both instruments are commonly included in a Geometry Box used by students for mathematics and geometry exercises.
Before starting, make sure your instruments are clean, properly aligned and easy to handle. You can also check the geometry box checklist for students in Pakistan to understand which tools are useful for school geometry work.
How to Use Compass and Protractor Step by Step
Accurate geometry drawings depend on correct positioning, light pencil marks and careful measurements. Follow these practical steps to measure angles, draw arcs and check your work.
Step 1: Prepare Your Drawing Materials
Start by arranging the following items:
- A sharp HB pencil
- A mathematical compass
- A transparent or semicircular protractor
- A ruler or straightedge
- Plain or ruled paper
Place your paper on a flat desk so it does not move while drawing. For geometry exercises, unruled or lightly ruled [Paper Sheets] are often easier to work with because they allow clear construction lines.
Use a sharp pencil to create thin lines. Thick pencil marks can make it difficult to identify the exact point where two lines meet.
Step 2: Measure an Existing Angle With a Protractor
Suppose your mathematics teacher asks you to measure an angle drawn on paper.
Follow these steps:
- Identify the vertex, which is the point where the two arms of the angle meet.
- Place the centre mark of the protractor directly over the vertex.
- Align the protractor’s baseline with one arm of the angle.
- Check which scale starts at 0° on the aligned side.
- Read the number where the second arm crosses the scale.
For example, if the second arm crosses the correct scale at 60°, the angle measures 60 degrees.
Important: Most semicircular protractors have two number scales. Always read the scale that begins at 0° on the baseline side. Reading the opposite scale is a common reason students record incorrect answers.
Step 3: Draw an Accurate Angle Using a Protractor
Now, imagine you need to draw a 120° angle for a school mathematics assignment.
- Draw a straight baseline using a ruler.
- Mark a starting point on the line. This will be your vertex.
- Position the protractor’s centre directly over the vertex.
- Align its baseline with the horizontal line.
- Locate 120° on the correct scale.
- Make a small pencil mark at 120°.
- Remove the protractor and draw a straight line from the vertex through your mark.
You now have an angle measuring 120°.
You can use the same process to construct common angles such as 30°, 45°, 60°, 90° and 150°.
Step 4: Use a Compass to Draw an Arc
A compass is particularly useful when constructing circles and arcs.
For example, imagine you need to draw an arc with a radius of 4 cm.
- Place the pointed leg of the compass on the paper.
- Adjust the pencil leg until the distance between both points is 4 cm using a ruler.
- Keep the pointed leg firmly in place.
- Rotate the compass gently while maintaining the same opening.
- Stop at the required position to create an arc.
Avoid changing the compass opening while drawing. Even a small movement can affect the radius and make the construction inaccurate.
Step 5: Construct a 60° Angle Using a Compass and Ruler
You can also construct a 60° angle without reading a protractor scale. This technique is useful for traditional geometry questions.
- Draw a straight line and mark its starting point as A.
- Place the compass point on A and draw an arc that crosses the line at B.
- Without changing the compass width, place its pointed leg on B.
- Draw another arc that intersects the first arc at C.
- Use a ruler to join A to C.
The angle BAC is 60° because the three sides AB, BC and AC have equal lengths, forming an equilateral triangle.
This method is particularly helpful when an exam question specifically asks you to construct an angle using a compass and ruler.
Step 6: Check the Accuracy of Your Drawing
After completing your construction, check the measurements before submitting your work.
- Place the protractor’s centre over the angle’s vertex.
- Align the baseline with one arm.
- Read the correct degree scale.
- Check whether the measured angle matches the required value.
- Use a ruler to check straight lines and a compass to compare equal distances.
For example, if you constructed a 90° angle, check that the two arms form a right angle. If the reading is slightly different, review the alignment and repeat the construction if necessary.
Common Mistakes Students Should Avoid
Even students who understand geometry can make mistakes when using measuring instruments. Here are some common problems and how to prevent them.
|
Common mistake |
How to avoid it |
| Misaligning the protractor | Place its centre exactly over the vertex. |
| Reading the wrong scale | Start from the 0° mark on the aligned arm. |
| Moving the compass point | Hold the pointed leg firmly in position. |
| Changing the compass radius | Keep the opening fixed while drawing. |
| Using a blunt pencil | Sharpen the pencil for clearer construction lines. |
| Drawing thick lines | Use light, thin pencil strokes. |
Another common problem is using damaged or poorly marked instruments. Check your compass hinge and protractor markings before starting an important geometry assignment.
Choosing the Right Geometry Tools for School and College
Not every student needs the same stationery. Primary school students may need basic drawing instruments, while secondary school and college students often require more accurate measuring tools for advanced geometry.
| Tool | Best for |
What to look for |
| Basic plastic protractor | School geometry | Clear degree markings |
| Transparent protractor | Accurate measurements | Visible baseline and centre |
| Adjustable compass | Drawing circles and arcs | Secure hinge and sharp point |
| Metal compass | Frequent geometry work | Durable construction |
| HB pencil | Construction lines | Sharp and easy-to-erase lead |
When comparing school stationery, consider the student’s age, class level and mathematics syllabus. A younger student may need a simple plastic set, whereas secondary school students may benefit from a more durable compass and clearly marked protractor.
You can also explore suitable Pencil grades HB 2B 6B to understand which pencils work best for different drawing activities.
For parents preparing for back-to-school shopping in Pakistan, it is worth checking the complete School stationery list in Pakistan before purchasing individual supplies. Compare the available options, quality and prices in PKR, and check whether Cash on Delivery is available when ordering online.
Safety Tips for Students Using a Compass
A geometry compass has a pointed metal end, so students should learn to handle it carefully.
For younger students:
- Use a child-friendly compass with a protective cover.
- Ask a teacher or parent for help when adjusting the instrument.
- Never point the sharp end towards another person.
- Keep the compass closed when it is not being used.
For older students:
- Avoid placing fingers near the pointed leg while drawing.
- Do not leave an open compass inside a school bag.
- Store it in a protective geometry box after use.
- Handle damaged or loose compasses carefully and replace them when needed.
Teachers should supervise younger children during geometry activities, particularly when using metal-pointed instruments.
How to Keep Geometry Instruments Organised
Students often lose small stationery items during busy school sessions and exam preparation. Keeping your instruments in one place makes geometry practice easier.
Try these simple habits:
- Return your compass and protractor to the geometry box after every lesson.
- Keep pencils and rulers in separate compartments.
- Check your supplies before leaving school.
- Avoid borrowing instruments without returning them.
- Clean your tools occasionally to keep degree markings visible.
A practical best pencil box for kids in Pakistan can also help younger students organise their everyday stationery.
Conclusion
Learning how to use compass and protractor correctly is an important part of developing strong geometry skills. A protractor helps measure and construct angles, while a compass makes it easier to draw accurate circles, arcs and geometric shapes.
With regular practice, careful alignment and the right stationery, students can complete mathematics assignments more confidently and produce cleaner diagrams during school and college exams.
Explore The Stationery Spot for useful [School Supplies] and geometry essentials that help students stay prepared for everyday classroom activities.
Frequently Asked Questions
How do you use a protractor to measure an angle?
Place the centre of the protractor over the angle’s vertex and align its baseline with one arm. Read the degree marking where the other arm crosses the correct scale.
How do you draw a 90-degree angle using a protractor?
Draw a straight baseline and place the protractor’s centre at the starting point. Mark 90° on the correct scale, then draw a line connecting the mark to the vertex.
How do you draw a circle using a compass?
Adjust the compass opening to your required radius using a ruler. Place its pointed leg at the centre and rotate the pencil leg around it without changing the opening.
Can you construct a 60-degree angle without a protractor?
Yes. Draw a baseline, make an arc from its starting point, and use the same compass width to draw another arc from the intersection. Join the starting point to the arcs’ intersection to construct 60°.
Which pencil is best for geometry drawings?
An HB pencil is generally suitable for geometry because it creates clear, reasonably light lines that are easy to erase. Keep it sharpened for more accurate diagrams.